Dr. Brady Okuda
August 18, 2024
The Steps to a Stunning a Smile
The Invisalign®️ procedure is as comfortable and convenient as the treatment itself, especially when you visit Okuda Orthodontics. We’re breaking down exactly what happens every step of the way to give you a clear picture of what your smile transformation will look like.

Step 1

Consultation
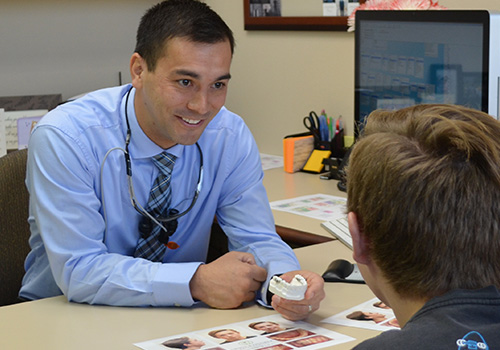
At your complimentary consultation, after you receive a warm welcome, we’ll take diagnostic records. These include photos of your teeth, smile and face, as well as 3D radiographs using our i-CAT™ imaging system. Once the images are uploaded to a computer, Dr. Noorda or Dr. Okuda will perform a thorough examination. They’ll use their findings to develop a diagnosis and then chat with you about what you can expect during your Invisalign treatment. Of course, we’ll also talk about the Invisalign cost, your insurance coverage and our flexible payment options.
Step 2

Create a Digital, 3D Image of Your Mouth
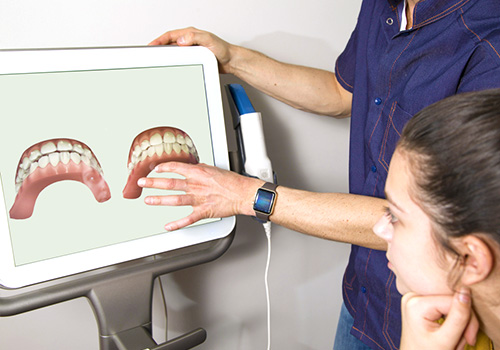
We’ll use our iTero® scanner to take quick, comfortable digital scans of your teeth and gums (no putty impressions here!). Once we input the information into our computer program, a digital, 3D model of your mouth will be created. Dr. Noorda or Dr. Okuda will plan out your treatment directly on this model. They will even be able to show you what your smile will look like at every stage of your treatment.
Step 3

Pick Up Your Custom Aligners
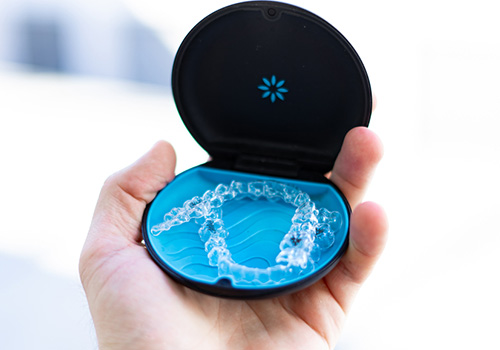
Invisalign will create a series of custom, clear plastic aligners based on Dr. Noorda or Dr. Okuda’s prescription. You’ll wear the aligners for about 20 to 22 hours per day, taking them out to eat, and to brush and floss your teeth. The number of aligners necessary will depend on your unique smile needs.
Step 4

Switch to a New Set of Aligners Every Week
While the schedule can vary by patient, for most treatment plans, you’ll change your aligners every week. Each set is programmed to achieve specific tooth movements. As you work through the series, you’ll watch your new smile gradually take shape. While Invisalign doesn’t require adjustments, you will come in about every six to eight weeks for a checkup so we can monitor your progress.
Step 5

Show Off Your New Smile
When you remove your final set of aligners, you’ll be able to bask in your beautiful new smile. To ensure your teeth remain in their new positions, we’ll fit you for a custom retainer. Don’t worry, you can opt for a clear retainer that works much like your Invisalign aligners.

Step 1
Consultation
At your complimentary consultation, after you receive a warm welcome, we’ll take diagnostic records. These include photos of your teeth, smile and face, as well as 3D radiographs using our i-CAT™ imaging system. Once the images are uploaded to a computer, one of our orthodontists will perform a thorough examination. They’ll use their findings to develop a diagnosis and then chat with you about what you can expect during your Invisalign®️ treatment. We’ll also talk about the cost, your insurance coverage, and our flexible payment options.
Step 2
Create a Digital, 3D Image of Your Mouth
We’ll use our iTero® scanner to take quick, comfortable digital scans of your teeth and gums (no putty impressions here!). Once we input the information into our computer program, a digital, 3D model of your mouth will be created. Dr. Noorda or Dr. Okuda will plan out your treatment directly on this model. They will even be able to show you what your smile will look like at every stage of your Invisalign®️ treatment.


Step 3
Pick Up Your Custom Aligners
Invisalign®️ will create a series of custom, clear plastic aligners based on Dr. Noorda or Dr. Okuda’s prescription. You’ll wear the aligners for about 20 to 22 hours per day, taking them out to eat and to brush and floss your teeth. The number of aligners necessary will depend on your unique smile needs.
Step 4
Switch to a New Set of Aligners Every Week
While the schedule can vary by patient, for most Invisalign treatment plans, you’ll change your aligners every week. Each set is programmed to achieve specific tooth movements. As you work through the series, you’ll watch your new smile gradually take shape. While Invisalign doesn’t require adjustments, you will come in about every six to eight weeks for a checkup so we can monitor your progress.


Step 5
Show Off Your New Smile
When you remove your final set of aligners, you’ll be able to bask in your beautiful new smile. To ensure your teeth remain in their new positions, we’ll fit you for a custom retainer. Don’t worry, you can opt for a clear retainer that works much like your Invisalign®️ aligners.

Expertly reviewed by:
Okuda Orthodontics dental team
August 18, 2024
At Okuda Orthodontics, Dr. Brady C. Okuda and the expert orthodontics team take great care in providing the highest level of orthodontic treatment for our patients. From Invisalign to braces our team of medical professionals will provide personalized and comfortable care that leaves your smile looking elevated and fresh.
Read Our Reviews
Find out what our patients are saying about their experience at Okuda & Noorda Orthodontics!
Check Out Our Results
See the real-life smile transformations of our Henderson, NV Invisalign and braces patients.
Book a Free Consultation
Schedule a complimentary visit with an orthodontist to find out how we can help give you a confident, healthy smile.

